Tutorial: Bysoft Cam
Last Update : February 10, 2025
Introduction
Floppy disks have disappeared from the market many years ago, but surprisly the machines needed them still largely used in various domains :
Video games, Retro computing, Music, CNC machines (manufacturing/industrial process)... An alternative to the floppy disks is needed for these machines to solve the availabilty and reliabity issues brought by this old support.
I personnally started this project in 2006 to revive my Atari ST and Amiga machines and to make them easier to use in the incoming world without floppy disks and floppy drives.
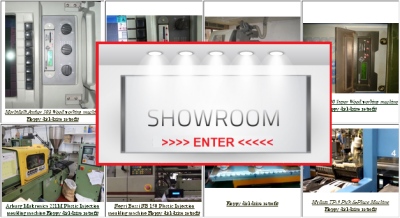
The project have grown with the various support requests received during all these years. It now supports hundreds of machines and floppy formats. See the showroom to have a preview of the currently supported machines.
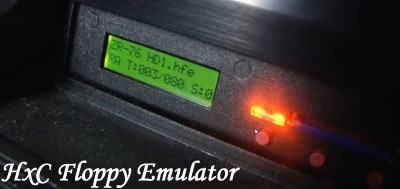
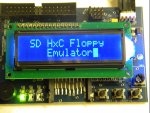
The HxC Floppy Emulator project main idea is to completely replace the floppy disk drive by an electronic device.
This electronic device emulate the floppy disk drive behavior and functionnalities.
The HxC Floppy emulators are designed to be very versatile and to support a large variety of computers / keyboards / samplers / CNC machines at a reasonable price.
The HxC Floppy Emulators support most existing floppy formats.
Today the HxC Floppy Emulator is a well established floppy disk drive replacement solution present into the retro-computing, Music and industrial domains. With several tens of thousands of units installed, the HxC Floppy Emulator is now a de facto reference !
Visit the showroom pages
to see HxC emulators usages examples :
The HxC project currently offers different floppy emulators and software solutions :
When you launch Bysoft, you will see several key panels:
For automated unloading (e.g., ByTrans, BySort):
Would you like a visual guide (images/annotations) or a deeper explanation of any specific step like common line cutting or technology assignment?
BySoft CAM (Computer-Aided Manufacturing) is a central component of the Bystronic software ecosystem, specifically designed to automate the transition from a CAD drawing to a finished laser-cut or bent part. 🛠️ Core Workflow: File to Part
The fundamental process in BySoft CAM involves several automated and manual steps to ensure precision and material efficiency:
Importing Files: Users can import 2D files (DXF) or 3D models (STP, SAT). The software automatically identifies profiles, material types, and thicknesses.
3D Unfolding: For sheet metal parts with bends, the unfold surface command calculates the exact flat pattern needed, accounting for material deformation.
Applying Technology: The software automatically selects the correct laser cutting technology, including gas types and machine-specific parameters, which can also be fine-tuned manually.
Nesting: BySoft optimizes the layout of multiple parts on a single sheet of raw material to minimize waste.
Simulation: Before sending the program to the machine, the system provides a cutting time simulation to verify the process and calculate production costs.
Bystronic's BySoft CAM is a powerhouse in the sheet metal industry, designed to streamline the journey from a digital drawing to a finished physical part. Whether you are working with laser cutting or press brake bending, this tutorial will walk you through the essential steps to master the BySoft workflow. 1. Importing and Preparing Your Parts
The process begins with getting your design into the system. BySoft CAM is highly versatile, supporting a wide range of native CAD formats including STEP, IGES, DXF, and SolidWorks.
2D Files (DXF/DWG): Navigate to the Part Editor and use the "Import Part" command. Once imported, you can define the material and sheet thickness. Use the Layer View to clean up the drawing by removing unnecessary construction lines or dimensions.
3D Files (STEP/STP): For 3D models, BySoft 7 features a Designer module that can automatically generate a perfect unfolding. You simply select a reference face, and the software calculates the thickness and collects all additional faces to create a flat 2D part for cutting. 2. Setting Up Cutting Technology
Once your part geometry is verified, you must apply the specific technology for your machine.
Automatic Selection: BySoft can automatically select the optimal cutting technology, gas parameters, and wizard files based on your specific machine type.
Manual Refinement: In the Cutting Technology tab, you can manually adjust lead-ins, common cutting paths, or "fly cutting" to improve efficiency.
PartID Marking: A useful modern feature is PartID, which laser-engraves a code onto the part during the cutting process. This allows for easy traceability and can be scanned later at the press brake to load the correct bending program automatically. 3. Nesting for Maximum Material Efficiency
Nesting is where BySoft CAM helps reduce costs by minimizing waste. The software ensures that sheet metal, tubes, and profiles are used to their maximum extent.
Tutorial: Bysoft Cam
When you launch Bysoft, you will see several key panels:
For automated unloading (e.g., ByTrans, BySort):
Would you like a visual guide (images/annotations) or a deeper explanation of any specific step like common line cutting or technology assignment?
BySoft CAM (Computer-Aided Manufacturing) is a central component of the Bystronic software ecosystem, specifically designed to automate the transition from a CAD drawing to a finished laser-cut or bent part. 🛠️ Core Workflow: File to Part
The fundamental process in BySoft CAM involves several automated and manual steps to ensure precision and material efficiency: bysoft cam tutorial
Importing Files: Users can import 2D files (DXF) or 3D models (STP, SAT). The software automatically identifies profiles, material types, and thicknesses.
3D Unfolding: For sheet metal parts with bends, the unfold surface command calculates the exact flat pattern needed, accounting for material deformation.
Applying Technology: The software automatically selects the correct laser cutting technology, including gas types and machine-specific parameters, which can also be fine-tuned manually.
Nesting: BySoft optimizes the layout of multiple parts on a single sheet of raw material to minimize waste. When you launch Bysoft, you will see several
Simulation: Before sending the program to the machine, the system provides a cutting time simulation to verify the process and calculate production costs.
Bystronic's BySoft CAM is a powerhouse in the sheet metal industry, designed to streamline the journey from a digital drawing to a finished physical part. Whether you are working with laser cutting or press brake bending, this tutorial will walk you through the essential steps to master the BySoft workflow. 1. Importing and Preparing Your Parts
The process begins with getting your design into the system. BySoft CAM is highly versatile, supporting a wide range of native CAD formats including STEP, IGES, DXF, and SolidWorks.
2D Files (DXF/DWG): Navigate to the Part Editor and use the "Import Part" command. Once imported, you can define the material and sheet thickness. Use the Layer View to clean up the drawing by removing unnecessary construction lines or dimensions. Nesting: BySoft optimizes the layout of multiple parts
3D Files (STEP/STP): For 3D models, BySoft 7 features a Designer module that can automatically generate a perfect unfolding. You simply select a reference face, and the software calculates the thickness and collects all additional faces to create a flat 2D part for cutting. 2. Setting Up Cutting Technology
Once your part geometry is verified, you must apply the specific technology for your machine.
Automatic Selection: BySoft can automatically select the optimal cutting technology, gas parameters, and wizard files based on your specific machine type.
Manual Refinement: In the Cutting Technology tab, you can manually adjust lead-ins, common cutting paths, or "fly cutting" to improve efficiency.
PartID Marking: A useful modern feature is PartID, which laser-engraves a code onto the part during the cutting process. This allows for easy traceability and can be scanned later at the press brake to load the correct bending program automatically. 3. Nesting for Maximum Material Efficiency
Nesting is where BySoft CAM helps reduce costs by minimizing waste. The software ensures that sheet metal, tubes, and profiles are used to their maximum extent.
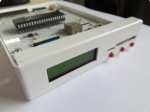
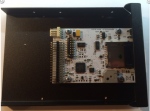
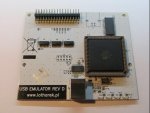
USB HxC Floppy Emulator
USB HxC Floppy Emulator hardware main features
- Read only Floppy emulator (SD,DD,HD & ED mode)
( No Write Support ! Have a look to the SD Card version for the write support!)
- USB 1.1 device interface (based on the FTDI FT245.).
- MFM, FM and GCR compatible (can handle custom encoding).
- Bitrate between 63Kbits/s and 1MBits/s.(250 differents bitrates by step of 62.5ns).
- Variable bitrate, flakey bits and long tracks, custom tracks support (emulation of copy protected floppies).
- Can emulate floppies up to 128 tracks.
- "jumper free" design : Device configuration done by software.
- Flexible floppy interface: Shugart, IBM PC and Amiga compatible.
To see the list of computer tested with it, please go to this List
All necessary informations to build your own USB HxC Floppy Emulator are available here.
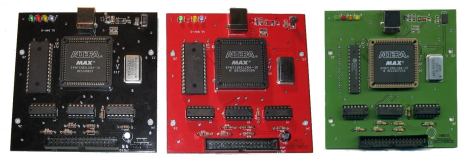
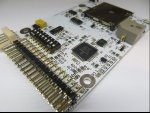
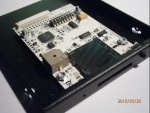
The main part of the USB HxC Floppy Emulator is a MAX EPM7128S CPLD from Altera with 128 Macrocell.
This chip is connected to a 32KB SRAM memory buffer and a FT245 from FTDI for the USB communication.
 |
Warning : Do not disconnect the floppy ribbon while the USB is connected ! This may damage the emulator and your equipements.
Always disconnect the USB cable before connect/disconnect the floppy ribbon.
|
USB HxC Floppy Emulator's schematic
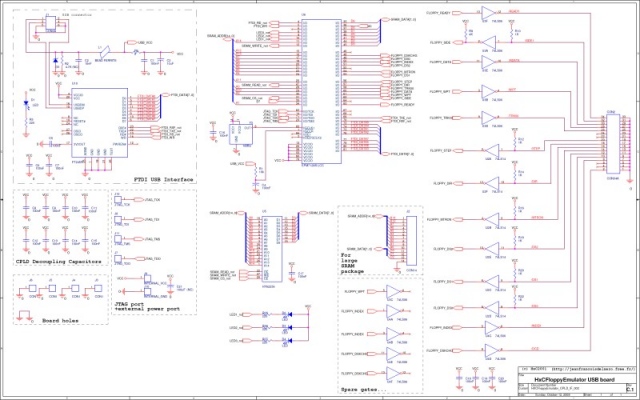
USB HxC Floppy Emulator CPLD
The bitstream to use to program the CPLD is available here.
To program this chip you can use Quartus II and an Altera compatible JTAG probe (The ByteBlaster for example).
The CPLD programming software can be downloaded from the Altera/Intel website.
Note : The EPM7128S CPLD can also be remplaced with the Atmel ATF1508AS.
the CPLD pinout assignation :
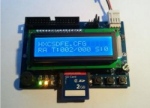
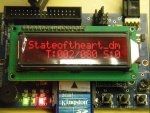
There are four LEDs on the board:
D1 : Power LED.
D2 : Select LED : Is on when the target computer acccess the floppy disk.
D3 : Step LED : Is on when the target computer is stepping/changing track.
D4 : Link LED : This is the USB link status: Is on when dialoging the host PC.
The VHDL sources are available here : VHDL USB HxC Floppy Emulator sources
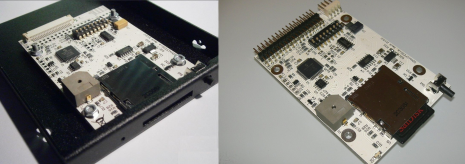
How to build the USB HxC Floppy Emulator ?
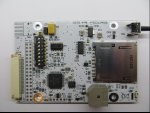
There are two differents USB HxC Floppy Emulator PCBs :
- An "homebrew" version (Rev B). This is a one layer "Do It Yourself" PCB.
- A "Production" version (Rev C). This is a two layers PCB. I recommend this version since it have a better layout.
Regarding the features of the board there are no differences between these two boards.
You can downlead the Schematic / PCB Layout / BOM of the revision B & C board here !
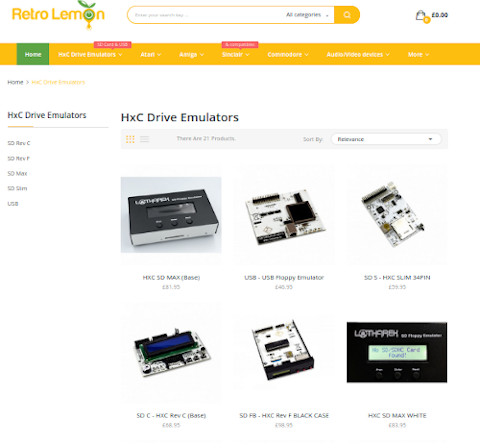
If you don't want build it, this board is also available to purchase. Have a look to the sale points section.
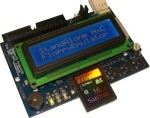
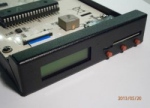
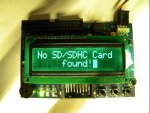
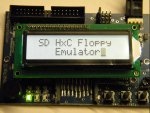
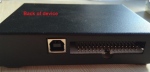
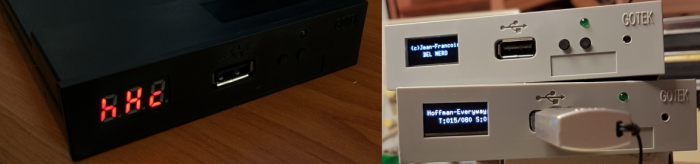
SD HxC Floppy Emulator REV F 3"1/2 Form factor/cased (HE10 34 pins interface)
Slim SD HxC Floppy Emulator
SD HxC Floppy Emulator REV C (HE10 34 pins interface
USB HxC Floppy Emulator

USB Stick STM32 HxC Floppy Emulator (HxC Firmware for Gotek) Store
Click on the above picture to visit the software store and get the HxC Firmware for Gotek License 
Third party tools
WinImage (shareware) : a Windows program to create/modify dos/fat12 files images.
https://www.winimage.com/
ImageDisk : A DOS software to read/write floppy disk.
http://dunfield.classiccmp.org/img/
OmniFlop : a Windows program to read almost any kind of non standard floppy disk.
http://www.shlock.co.uk
VFD - Virtual Floppy Drive : a Windows Floppy disk drive emulator : This software is able to mount an .IMG file as a floppy disk drive under windows.
http://vfd.sourceforge.net/
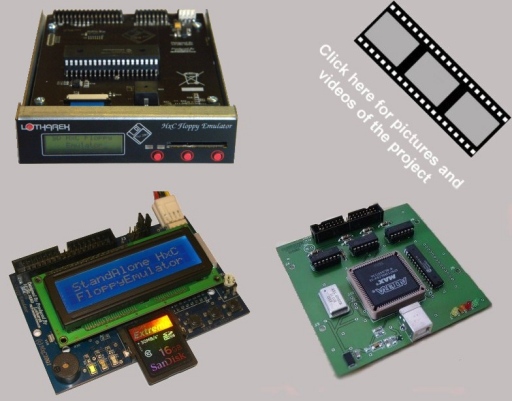
Videos / pictures
All pictures / videos of the project can be found on this page!
Contributors
| Jean-François DEL NERO (Jeff) |
Project Initiator - Main project developper/maintainer. |
| Gregory ESTRADE (Torlus) |
Forum hosting, FAT32 support of the SD HxC Floppy Emulator. |
| Christophe ESC. (Giants) |
Manufacturing of the First USB HxC Floppy Emulator batch. |
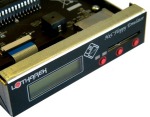
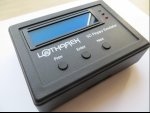
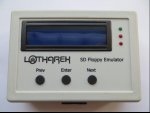
| Przemyslaw Krawczyk (Lotharek) |
Manufacturing and selling facilities. |
| Arnaud STORQ (Norecess) |
Amstrad CPC file selector optimization and support. |
| Gustavo E. A. P. A. Batista |
TRS-80 JV3 support implementation. |
| David Barr |
TRS-80 JV3 write support implementation. |
| Michael Gibs (gibs) |
Some incredible promotionals videos ;-) |
| Kris VC (Esynthesist) |
Providing a great help for the E-mu Emulator I & II support. (Technical informations and tests). |
| The Software Preservation Society Team |
Providing the first E-mu Emulator I & II floppy disk dump and E-mu track format. |
| Joseph REDON (Namida) |
NEC PC88 support tests. |
| Alex Mena |
x68000 support tests. |
| Petari |
Atari ST ST/MSA/STT support tests. |
| Jan Kiefer |
E-mu Emulator II tests. |
| Rosefloyd (One MPC Two DJ'S) |
E-mu SP1200 tests and some demos videos. |
And thanks to all others project contributors !: Bugs reports, new ideas submiters, code contributors, spreading the word about the project !